

SFX Techniques | Learn 6 best practices for cinematic sound design
One of the best ways you can enhance your visual projects is to use the power of sound. It’s essential to start with the highest-quality effects, but as with any tool, they need to be used with intention and purpose.
In the following 12 minute tutorial, you’ll see how we’ve used the Anticipation, Statement, and Archetype SFX libraries across many of our most popular videos and learn 6 big ideas for cinematic sound design. These are the tried and true techniques we’ve used for years at Lens Distortions.
Click play on the video below, enter your email address when prompted, and get ready to deploy the power of sound in your own projects.
Anticipation SFX
Bright, optimistic sound effects for inspiring projects.
Statement SFX
Modern, confident sound effects for bold projects.

Archetype SFX
Powerful, iconic sound effects for weighty films.
After entering your email address, you’ll be able to watch as many times as you’d like. The supplemental content below accompanies what you’ll learn in the tutorial video.
[By entering your email, you agree to our Privacy Policy]
Identifying where to use sound effects is the single most important part of sound design.
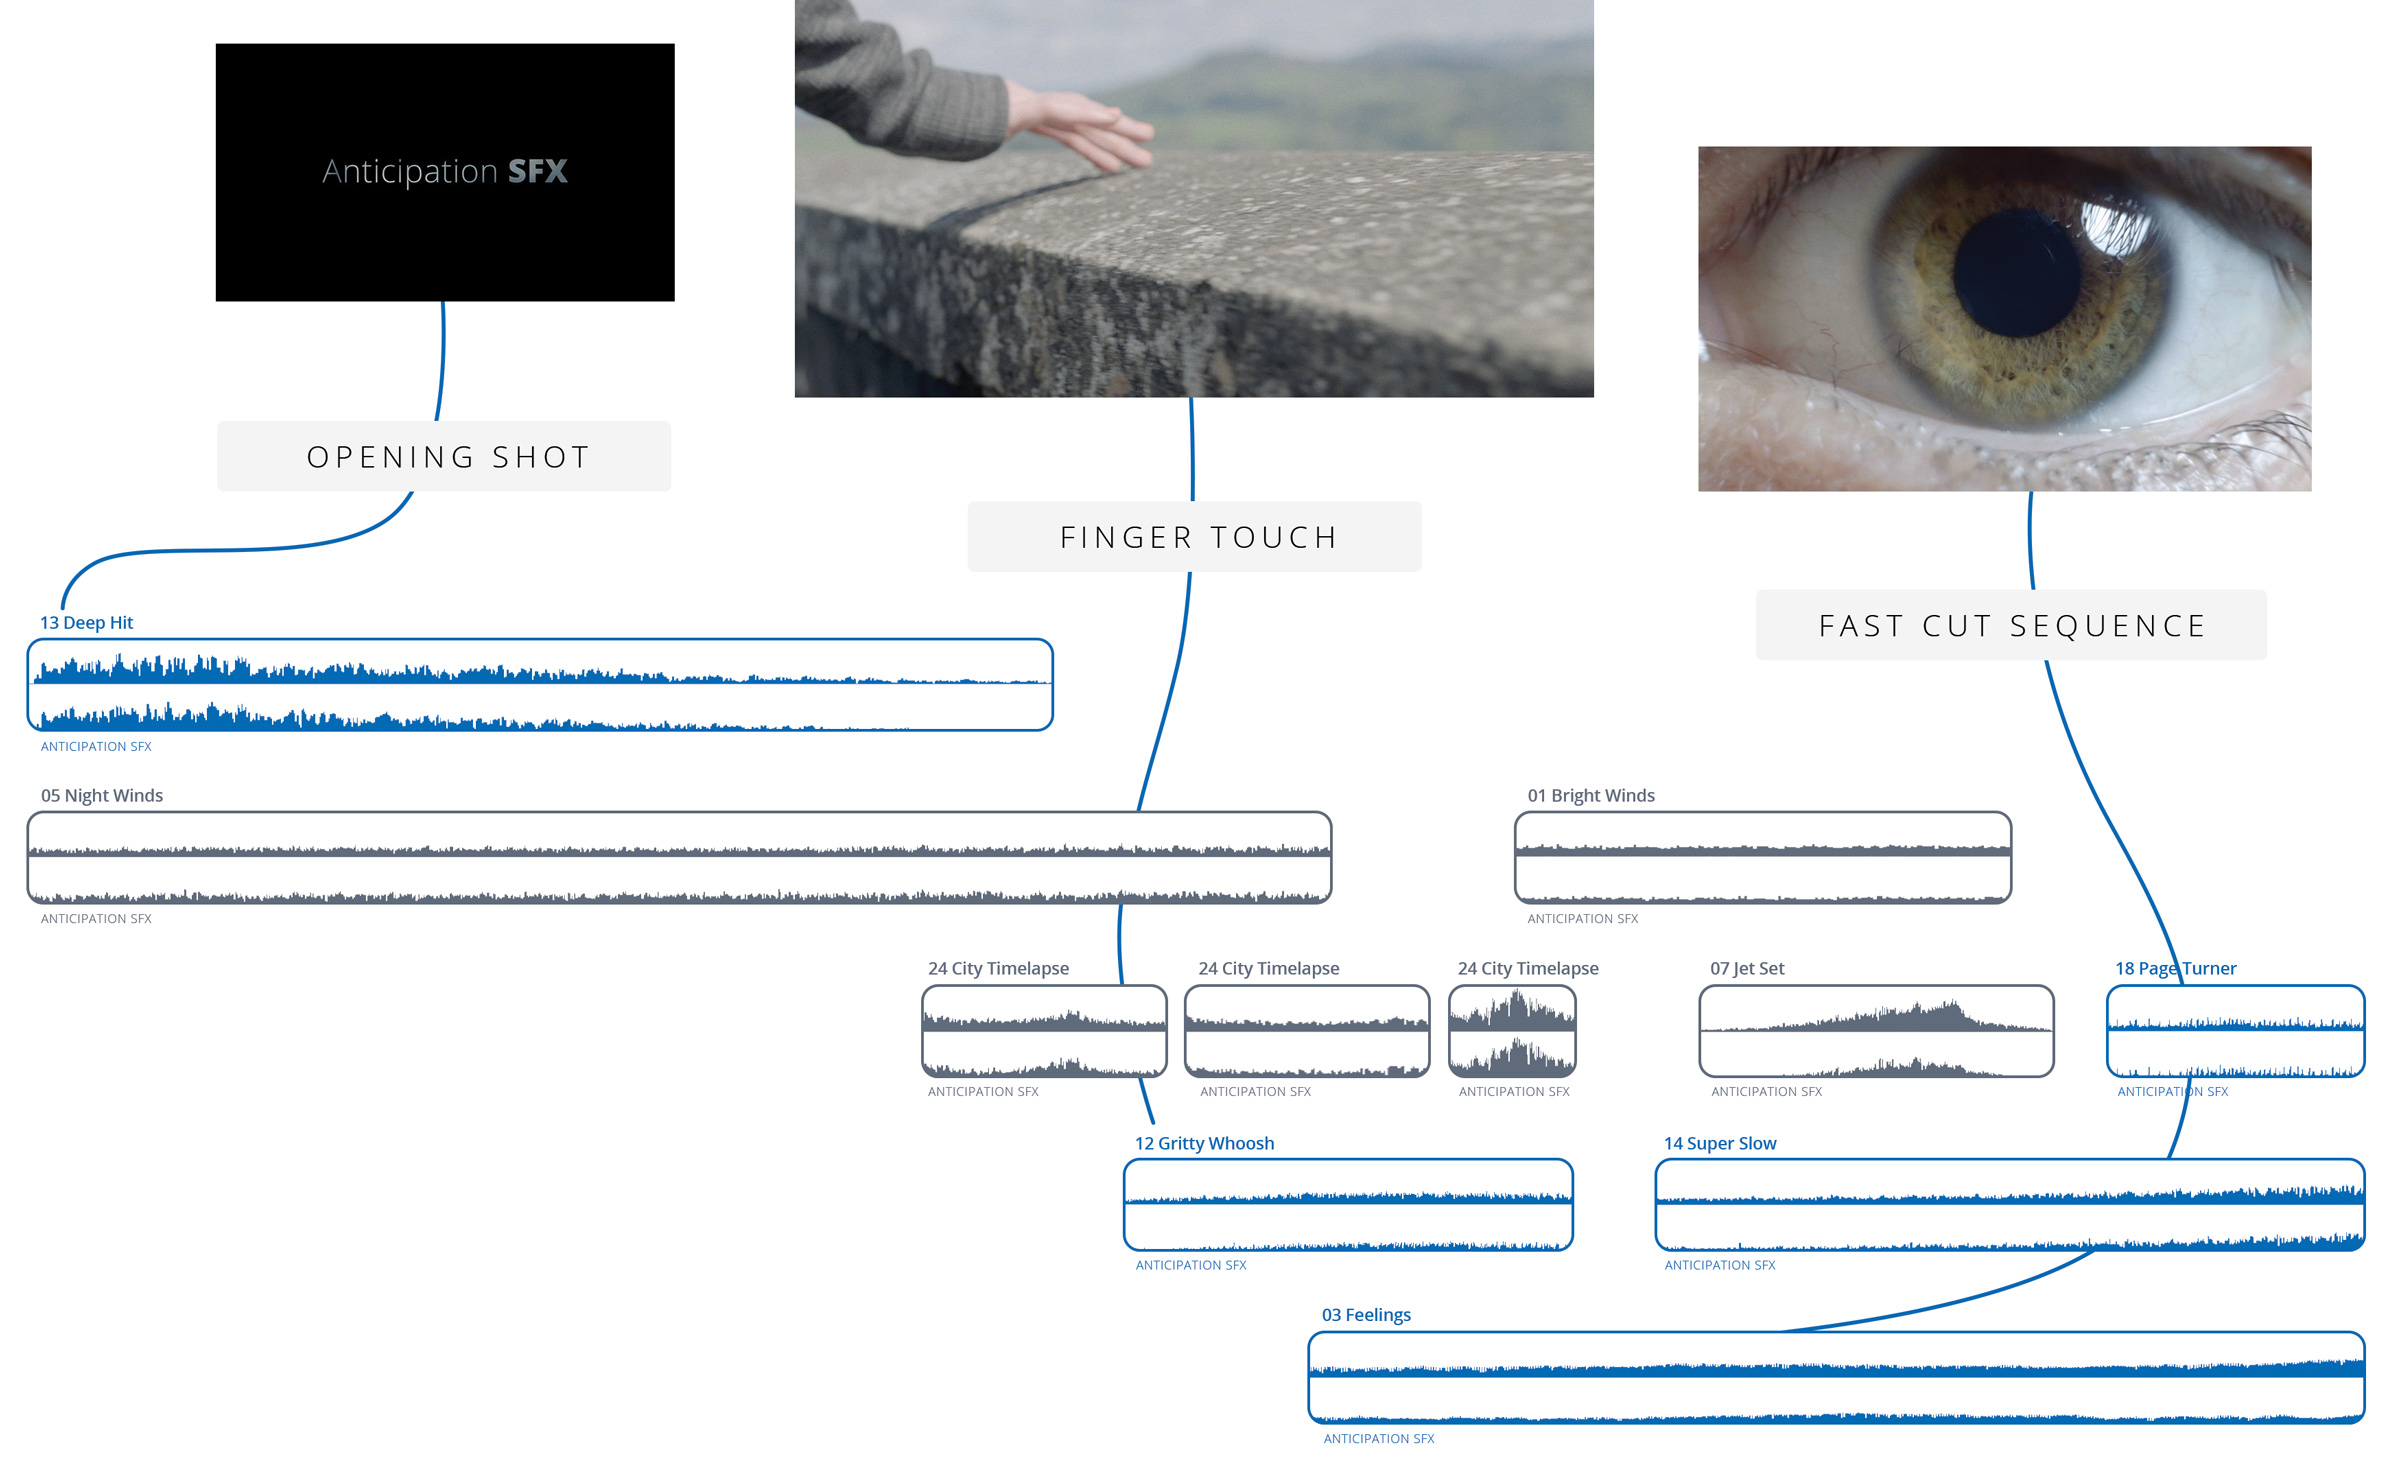
Opportunities are everywhere from the first frame of a video to the last. In addition to on-screen action, you can find sound motivation in things like timelapse and speed-ramped shots, transitions, title cards, and added visual effects. Watch 15 seconds of this Anticipation SFX trailer and you’ll notice all kinds of visual cues paired with sound.
Example from the Anticipation SFX Trailer
As you can see, the slightest movement paired with abstract sound can be just as powerful as matching an action to its literal sound.
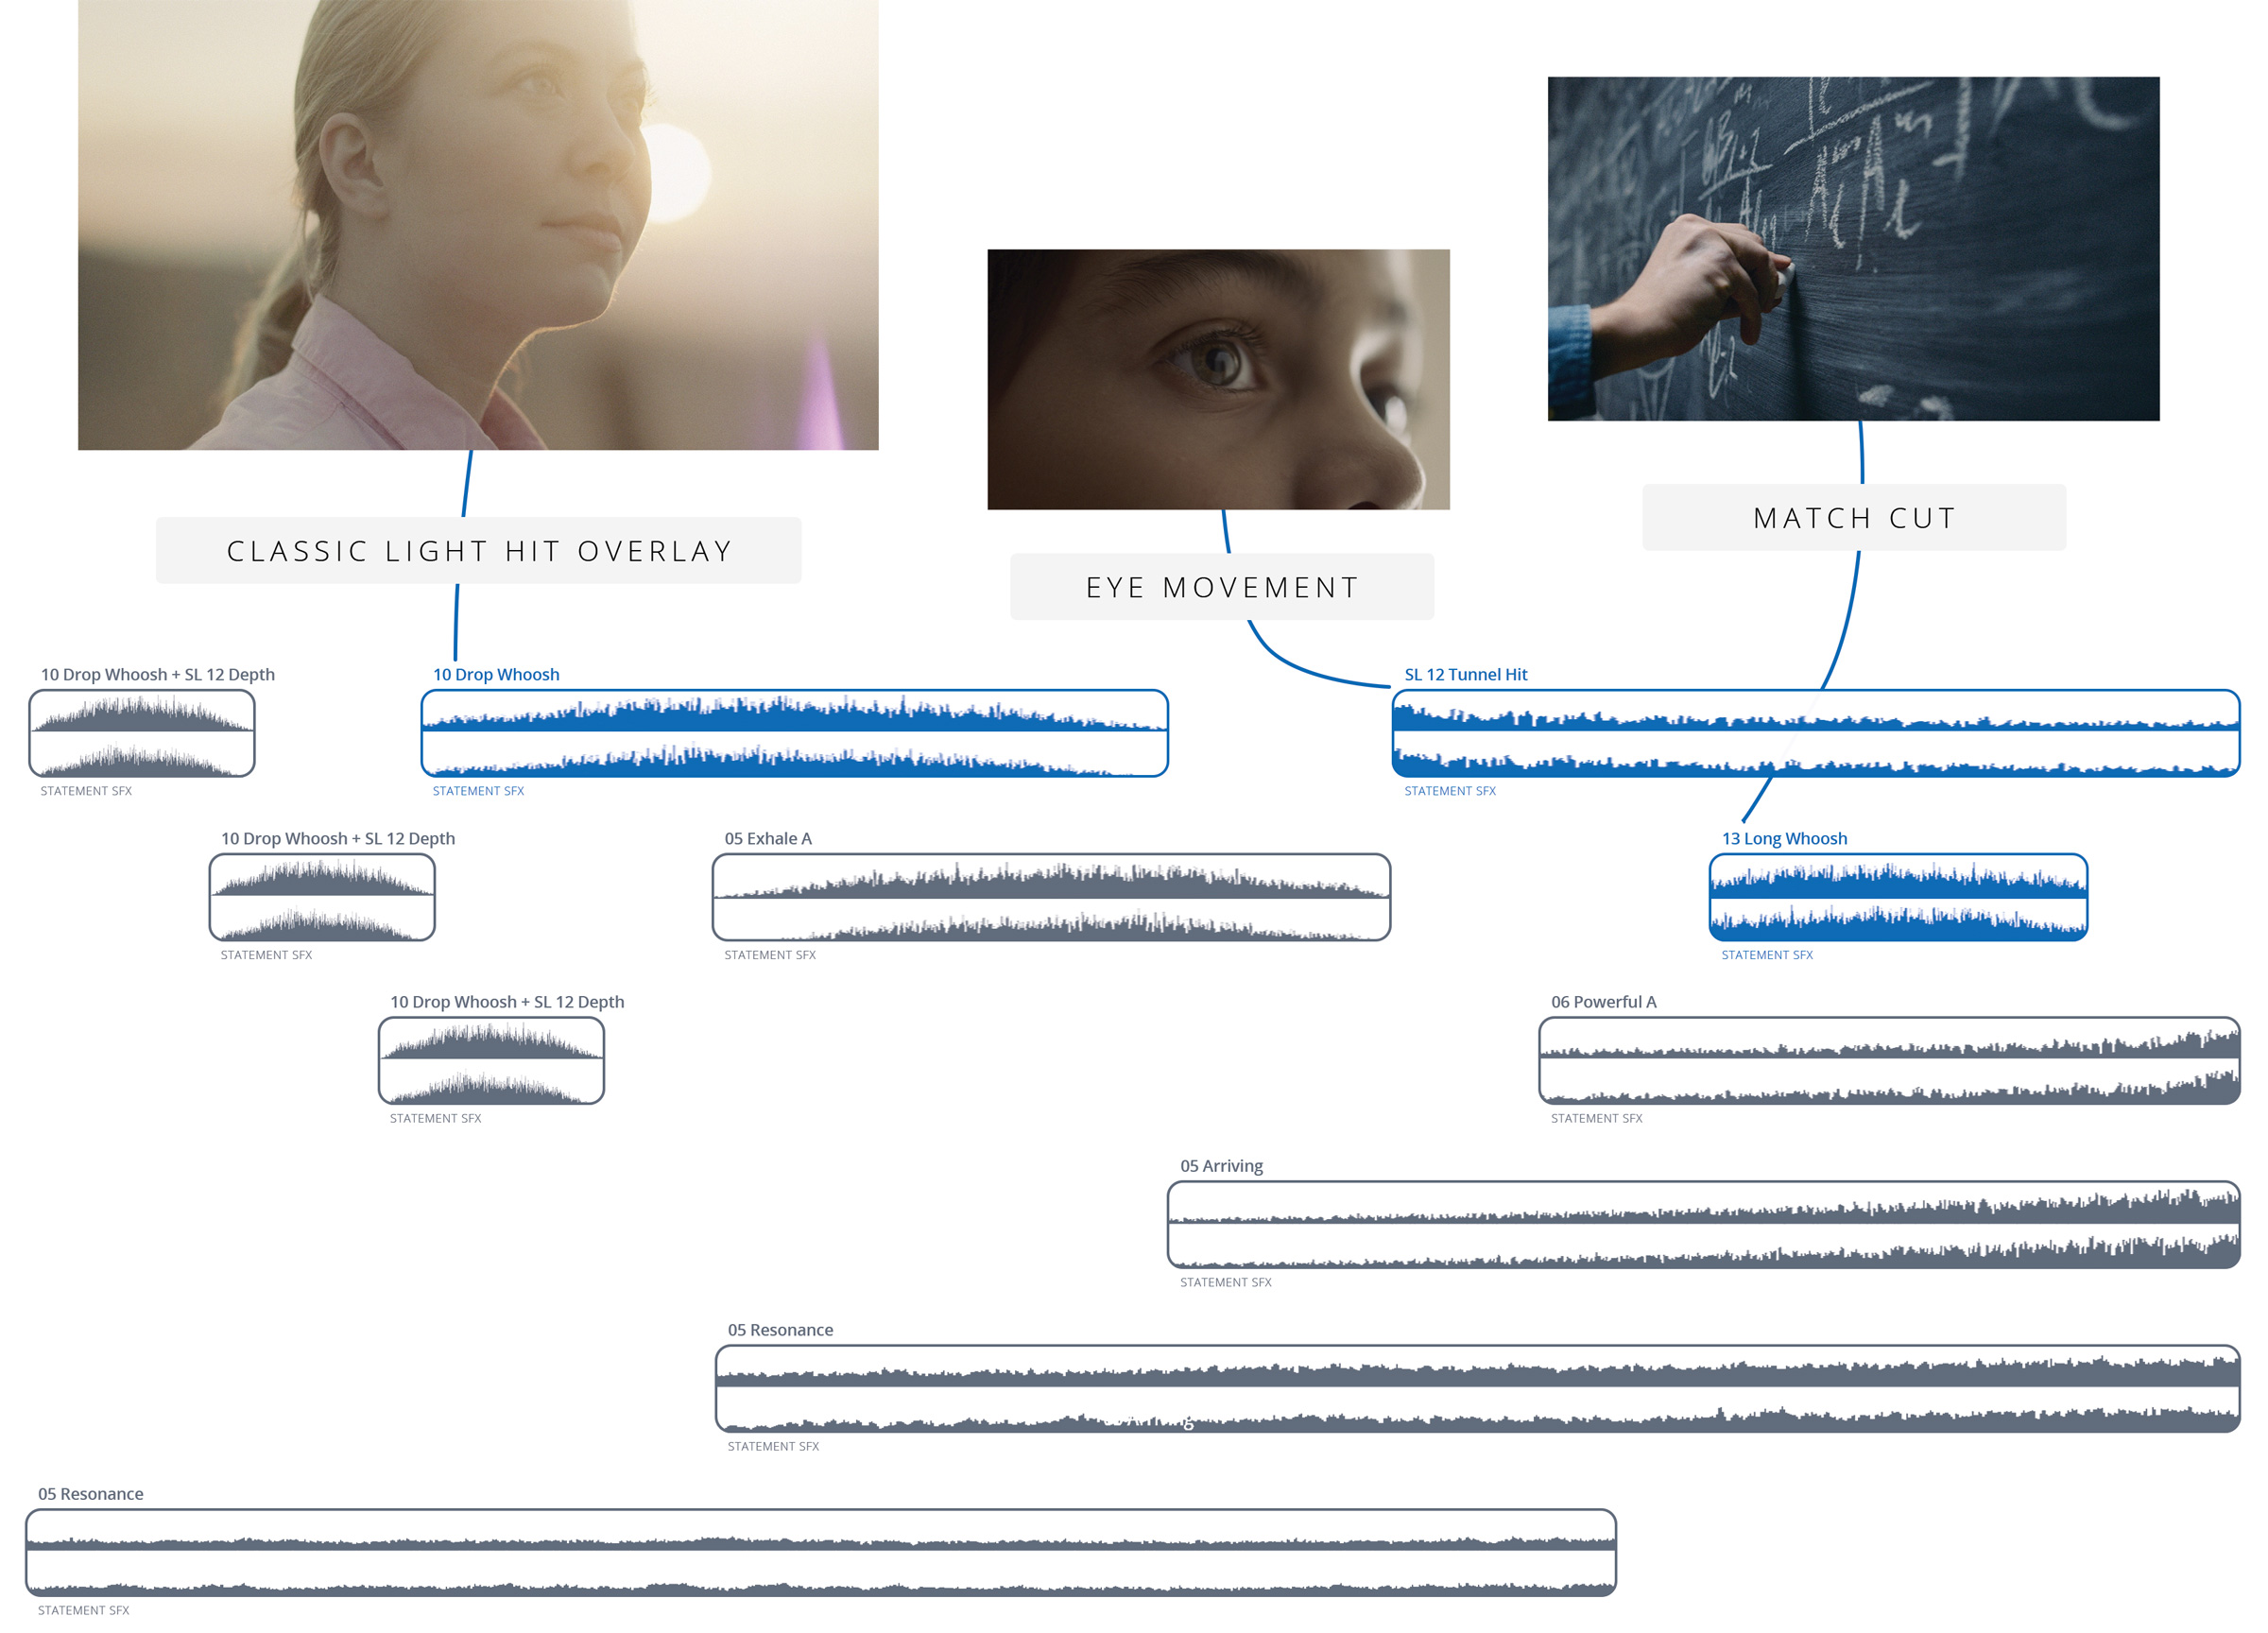
In this next example from our trailer for Statement SFX, you’ll notice some obvious sound motivation from the windmill, which was paired with some whooshes. The shot of the woman immediately following the windmill is actually a far more important shot but it lacked sound motivation of its own.
To solve this, we created our own sound motivation by adding a Classic Light Hits overlay, which we paired with an effect called Drop Whoosh. All this together gave the shot a visceral feeling.
Example from the Statement SFX Trailer
Watch the tutorial at the top of this post for a closer look at some of the primary sound motivation in the Anticipation SFX and Statement SFX trailers.
Cutting between fast and slow shots or loud and quiet sounds creates contrast, which is a great way keep your viewers engaged. In this trailer for Maven glass overlays, notice how visuals and sound work together in the quick intense shots to grab your attention and make the film more dynamic.
Example from the Maven Glass Overlays Trailer
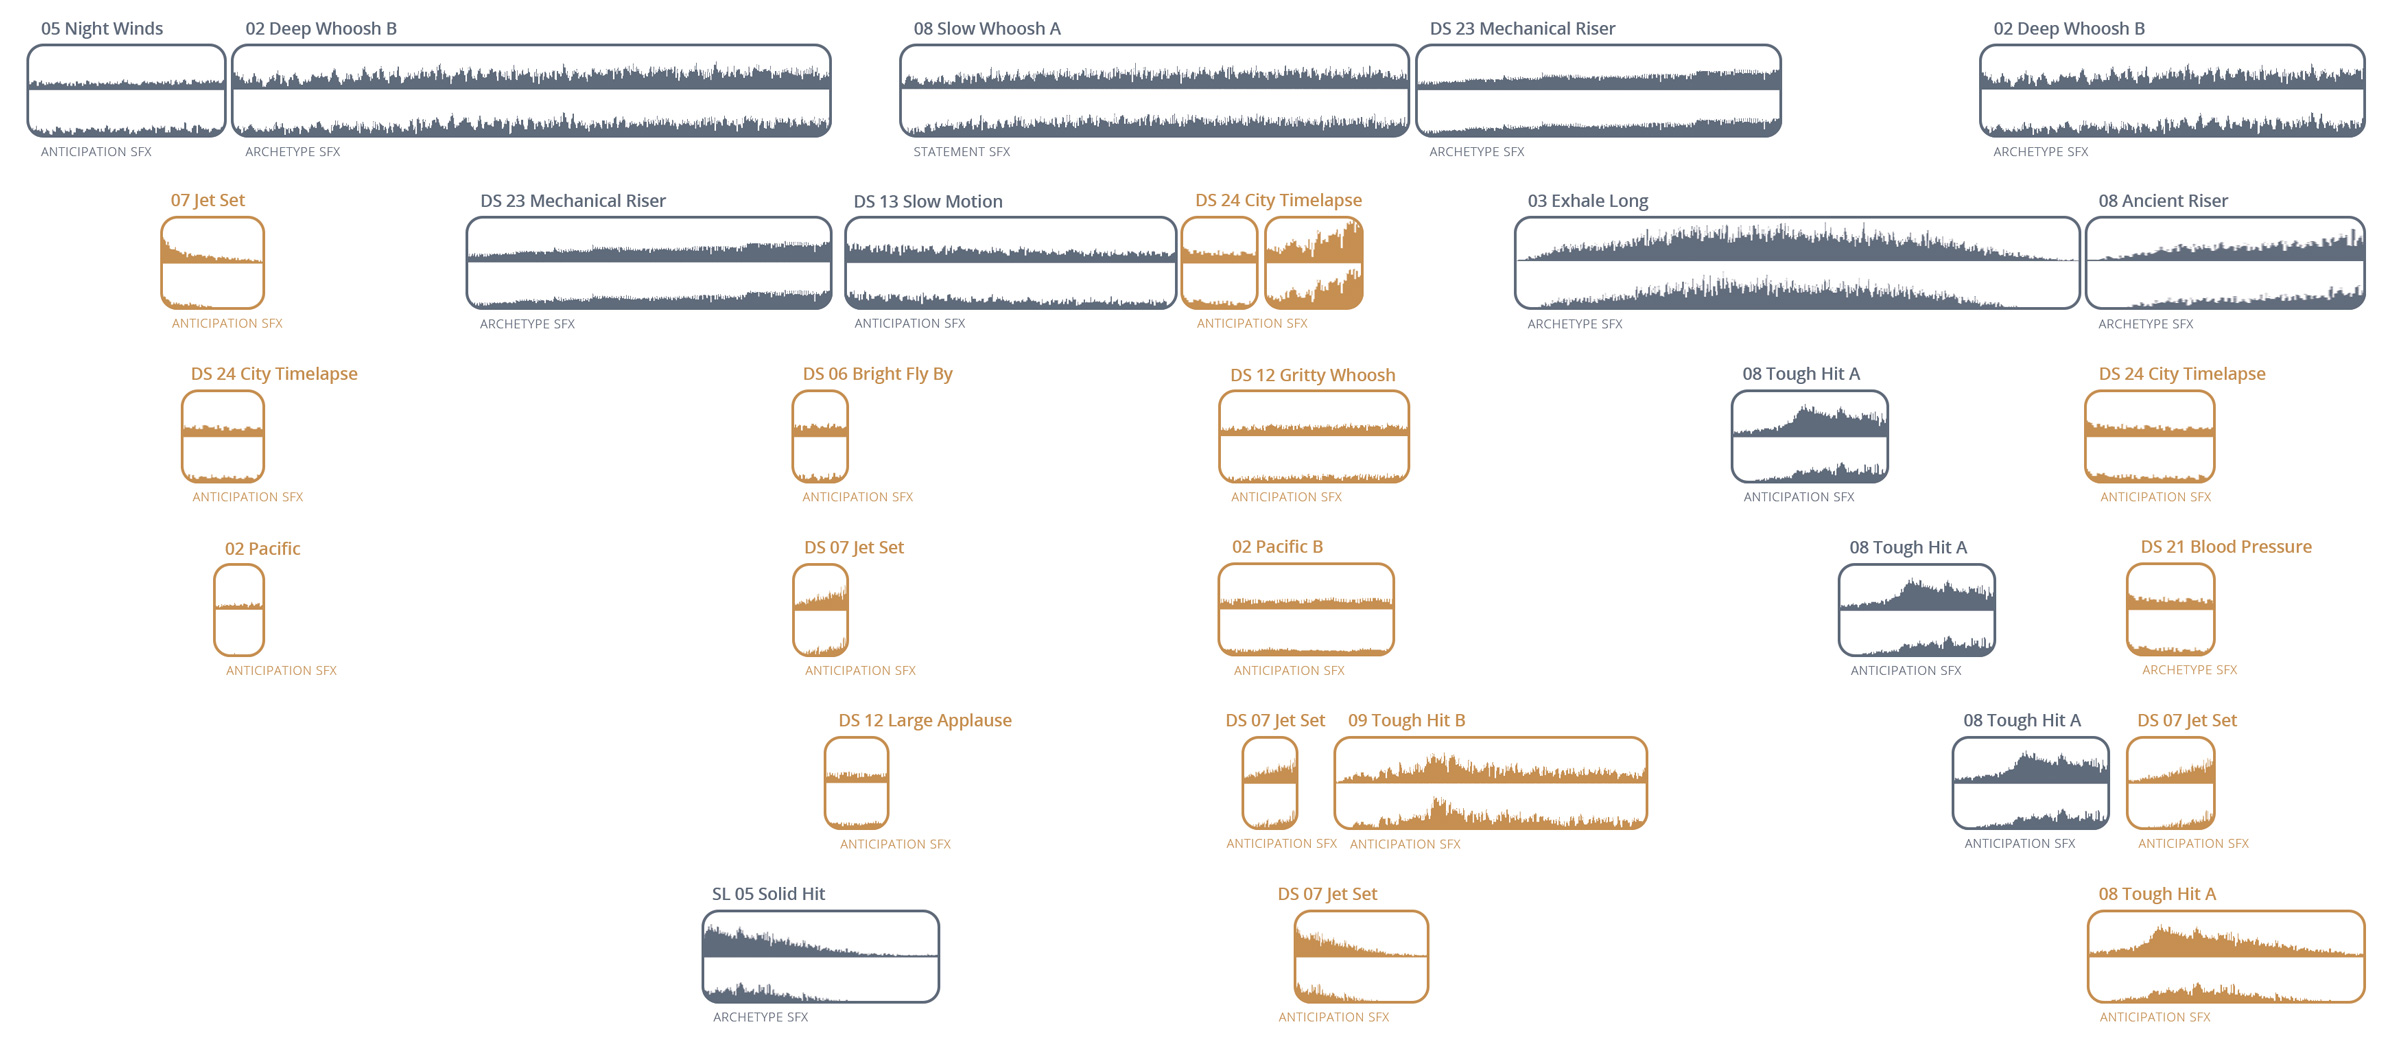
Below is a visual representation of the contrasting clips from the Maven trailer. The orange clips are the quick, intense sounds that break up the slow, quiet parts of the video.
It’s not always obvious, but sound is often what makes a cut between shots feel so big. This overview video for our Modern Light Hits pack moves along pretty subtly until the motorcycle scene hits you with a wall of sound.
Example from the Modern Light Hits Video
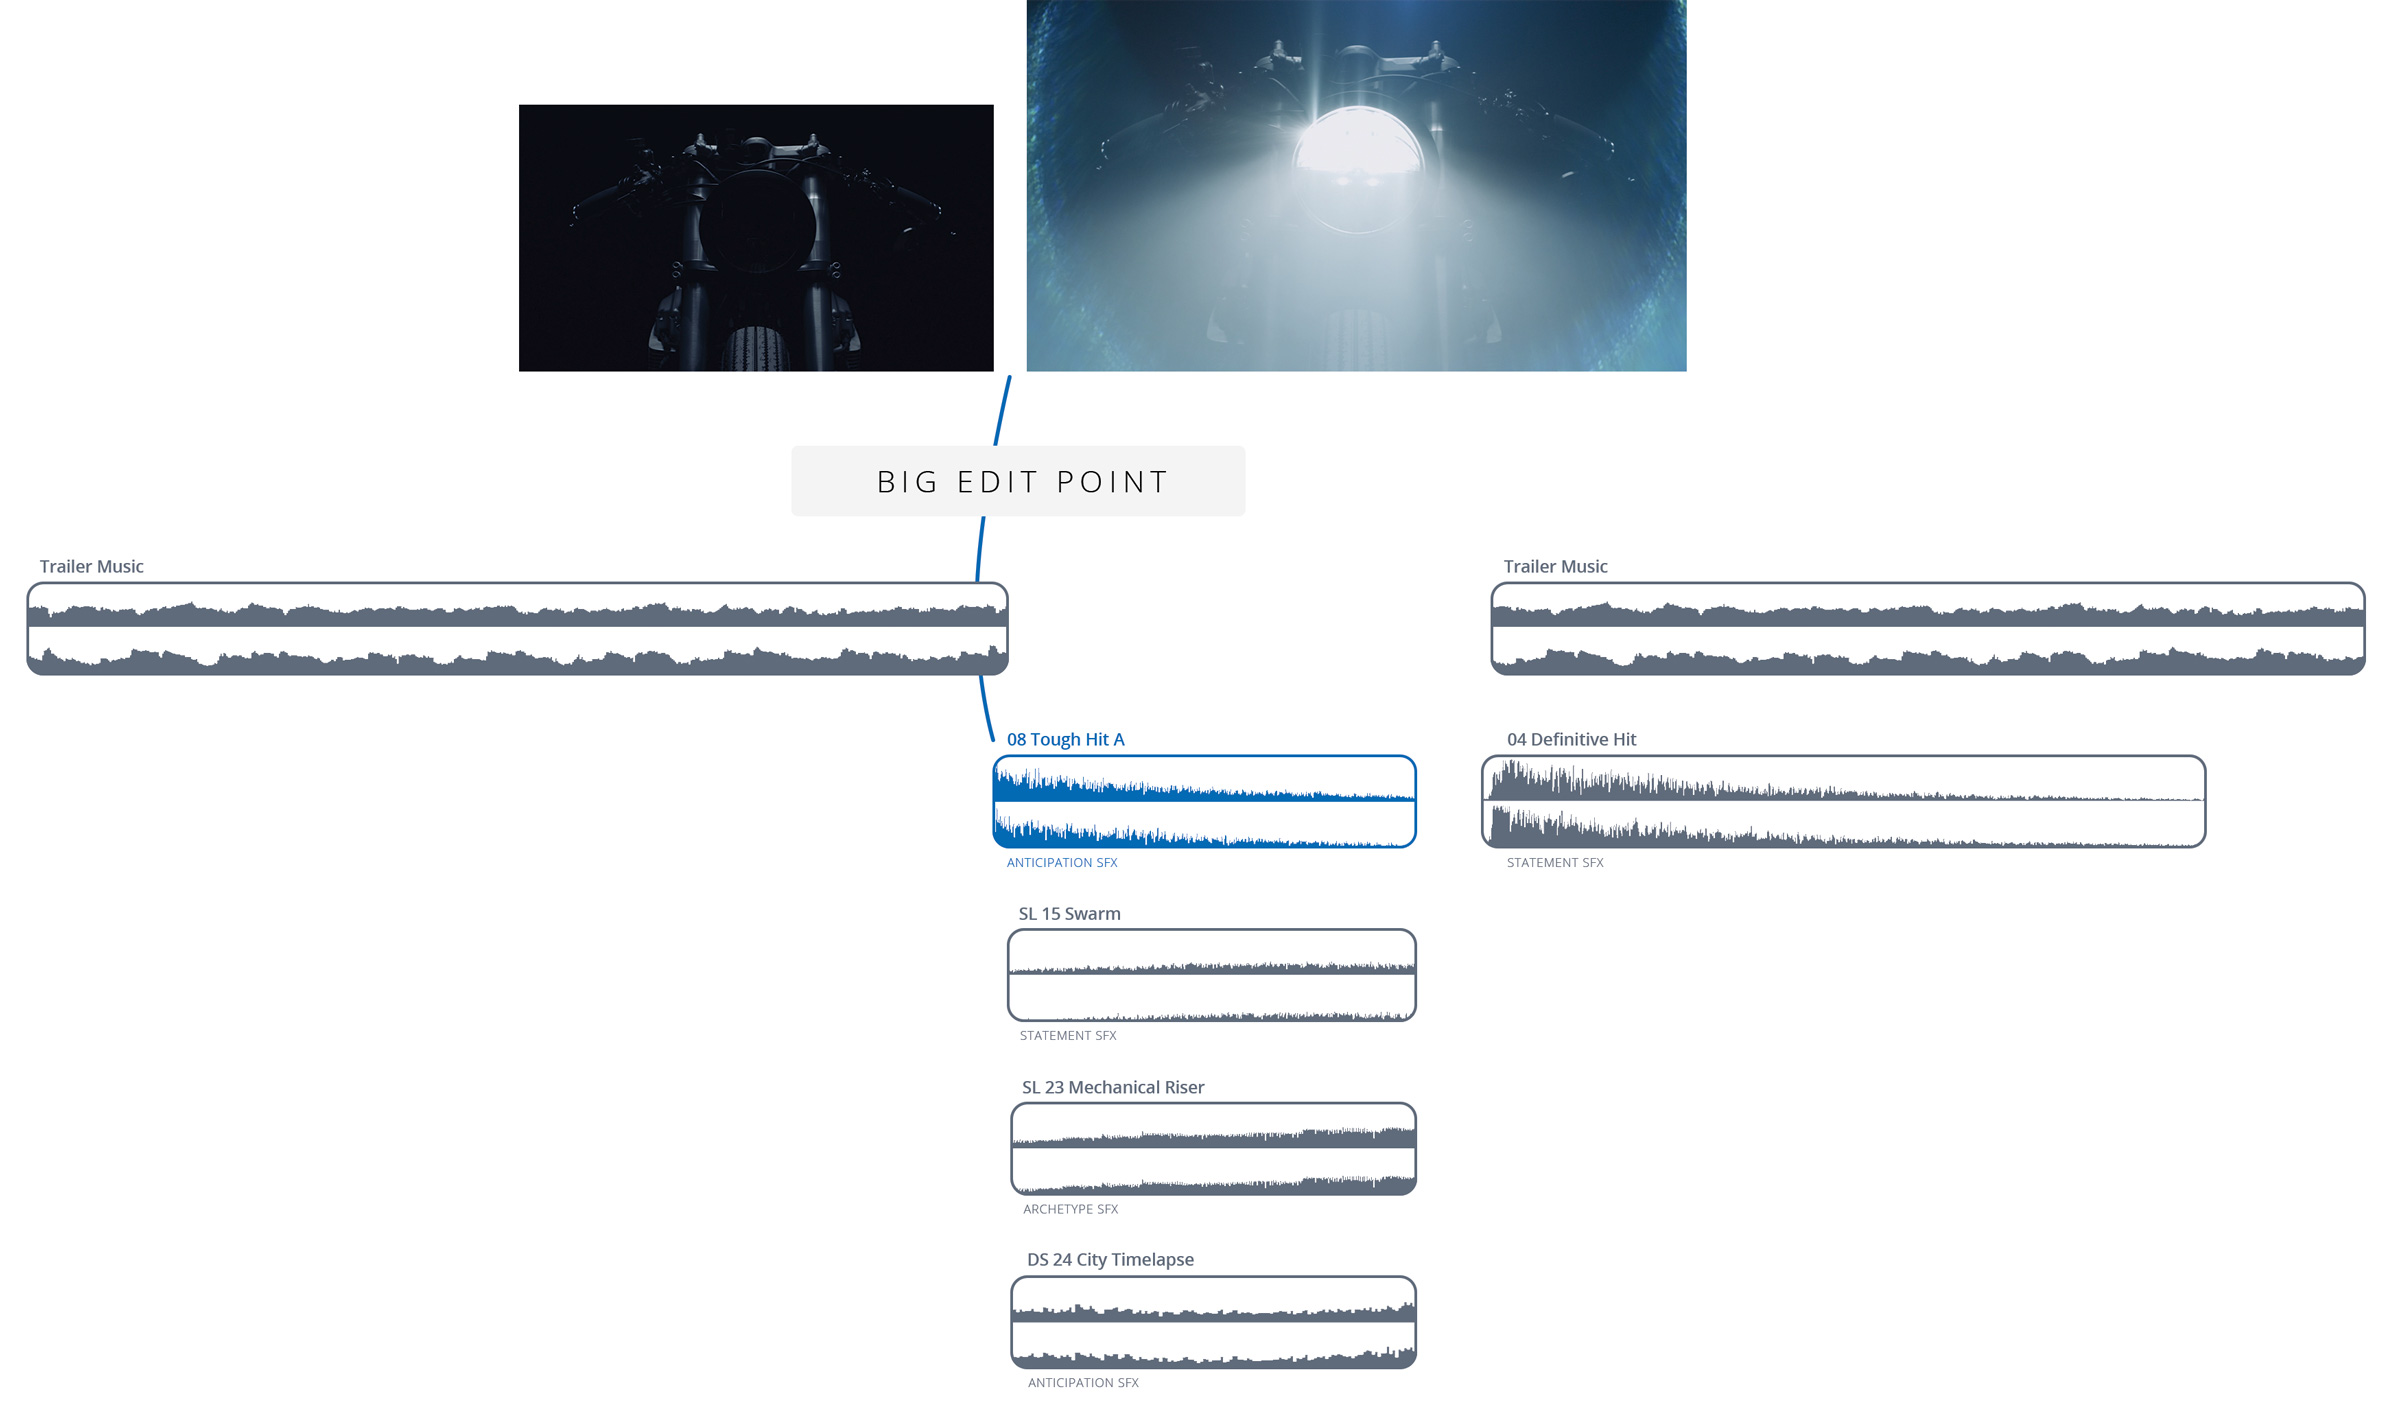
The video above combines all three techniques we’ve covered so far. We have sound motivation from the headlight popping on combined with the Modern Light Hit overlay that we added. We have contrast between the quiet theme music and the motorcycle action shot. And finally, all of this culminates at a single edit point. The combination of visual and sound is what makes the moment feel as big as it does.
Watch the full “6 Best Practices for Cinematic Sound Design” tutorial to see how we stacked sounds from multiple libraries to create the raw power of the edit.
Using the same sound in repetition can be a great way to build intrigue and cue your viewer that something is coming. In this trailer for Anticipation SFX, notice the repeating note that gradually gets louder and louder.
Example from the Anticipation SFX Trailer
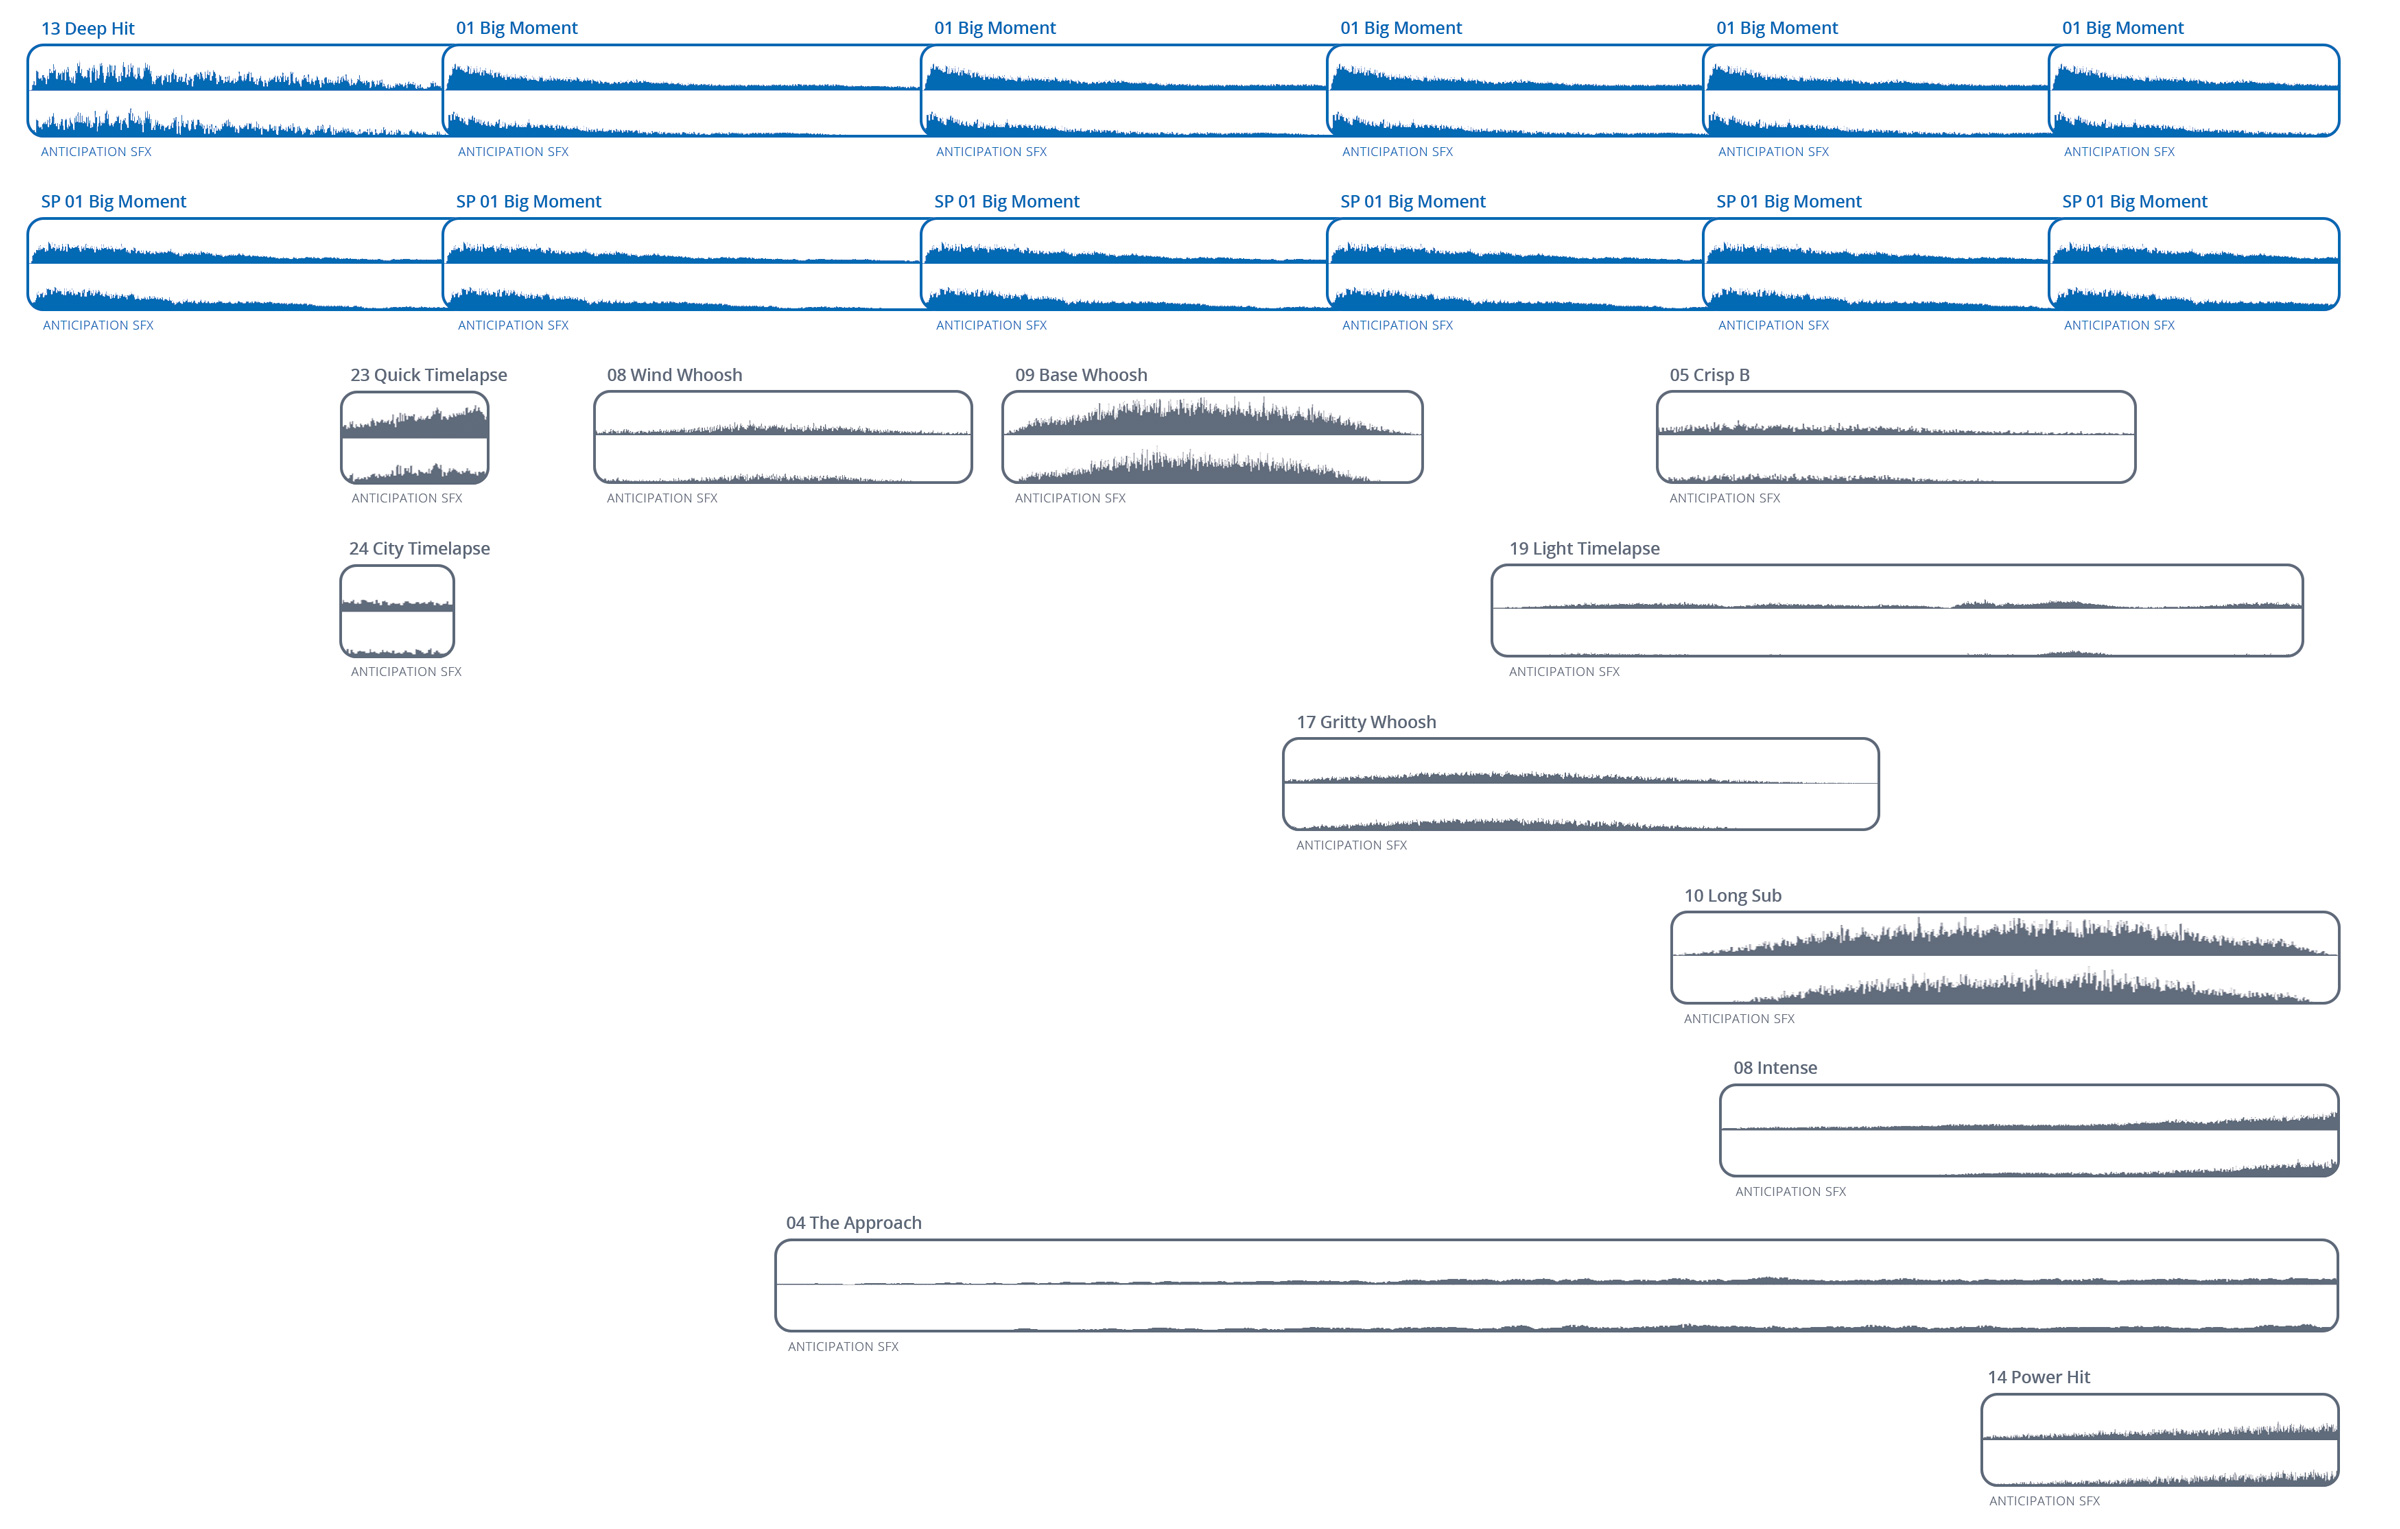
As you can see below, we actually combined two variations of the “Big Moment” sound effect that repeat as the sequence goes.
Toward the beginning of the video, the “Space” variation is louder and it sounds far away because of its reverb. Over time, the Space variation fades and the normal version of the clip becomes more prominent, which creates a sense of the sound getting closer.
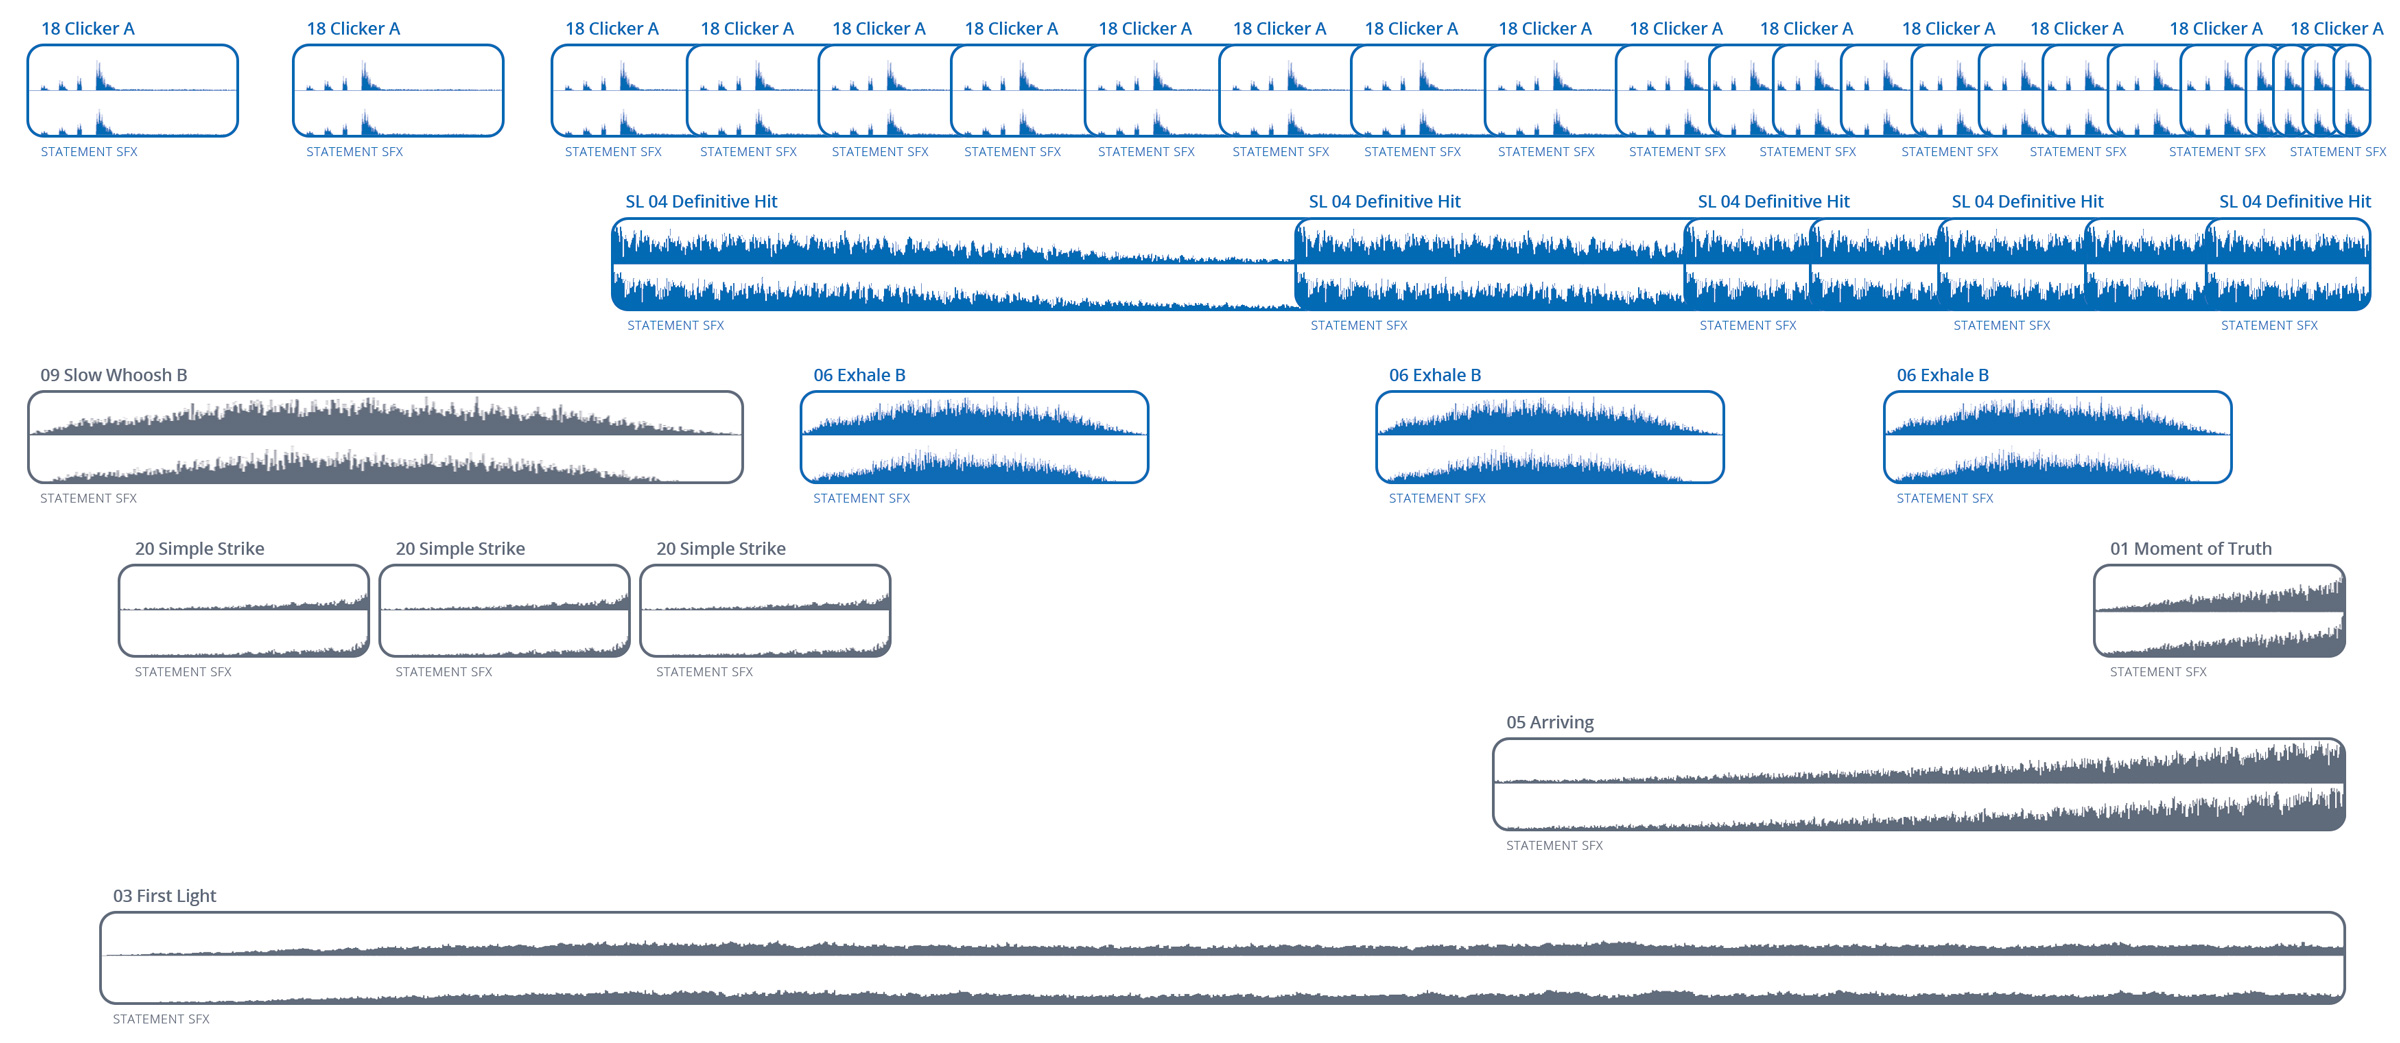
You can also use repeating sounds to create entire rhythmic soundscapes. Notice how the sounds repeat and build together to create momentum in this video for Statement SFX.
Example from the Statement SFX Trailer
It’s important to keep frequency ranges in mind when building sequences like this. Watch the full tutorial at the beginning of this post to learn more. If you’re interested in using this technique extensively, our Endurance Underscore Library was actually specifically designed for this exact purpose.
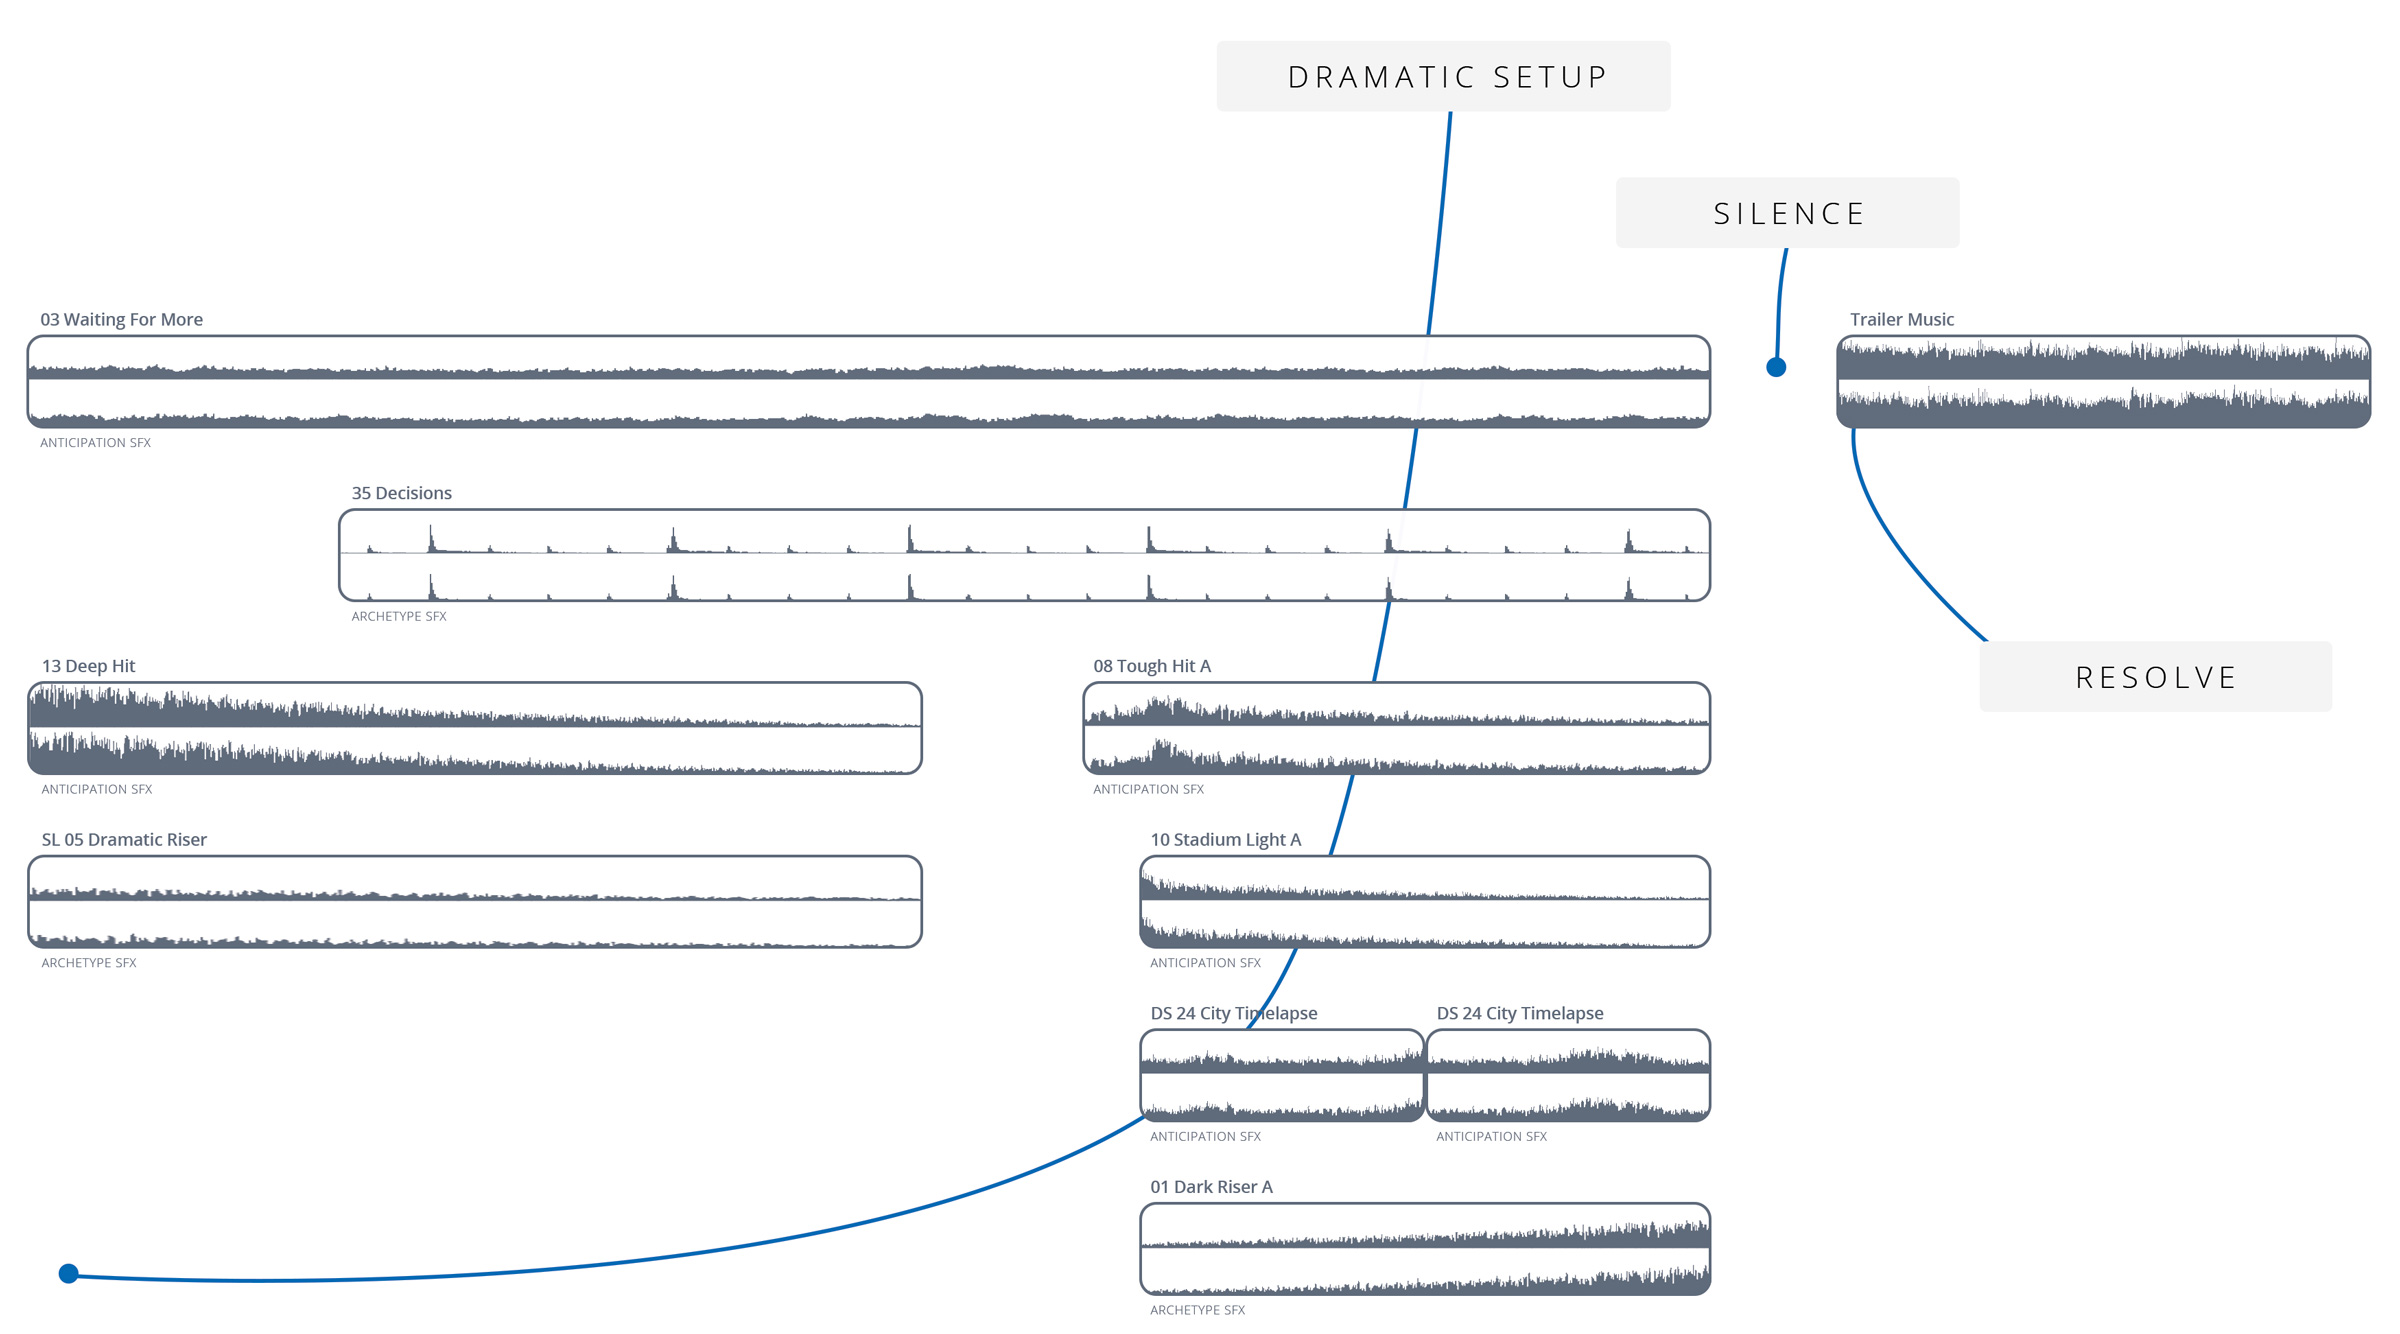
In this video for Luminary glass overlays, notice how we use sound to build up intrigue before launching into the theme song. But the most important part of this sequence is the strategic absence of sound… the silence just between the setup and resolve.
Example from the Luminary Video
Your job as an editor is to take your viewer on a journey and sound is an essential tool for making that journey interesting. Using sound, you can literally design how your viewer will feel. This video is a great example of how sound design doesn’t have to be complex, it just has to be intentional.
Our last tip is less about execution and more about preparation. Making the effort up front to organize your sound libraries will save you a ton of time over many projects.
If you’re using Adobe Premiere or Final Cut Pro X, consider importing all of your sound libraries into a master project that you always keep open. Then, as needed, you can drag and drop sounds into whatever project you’re currently working on.


