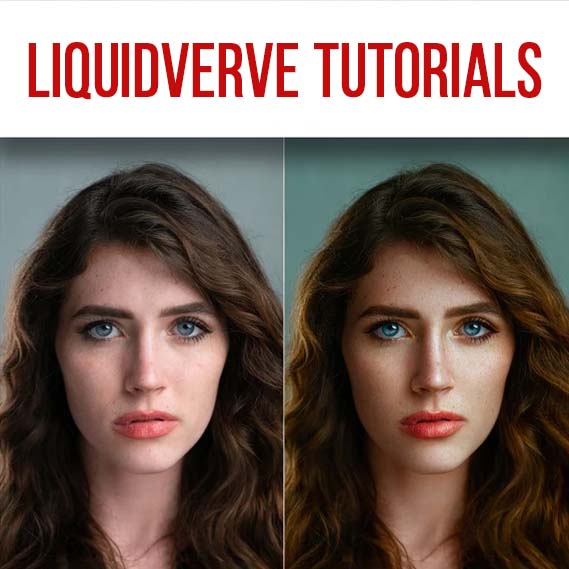
Liquidverve Tutorials Bundle
INCLUDED:
- Portrait Shooting Tutorial (Beginners to Intermediate)
- Portrait Editing Tutorial 2.0 (Narrative Editing)
- Dodge & Burn Portrait Retouching Tutorial 2.0
- Coloring and Stylization for Portraits v 3.0
Portrait Shooting Tutorial (Beginners to Intermediate)
This tutorial is a 3 hour crash course on how to shoot professional-grade creative portraits. We start out with some in-depth discussions on how to create more dimensional portraits via lighting and composition, how to organize shoot logistics such as finding locations and models, and lastly how to choose and use your gear. Then, we run through some demonstrations of what we’ve discussed via 3 sample shoots – daytime, sunset, and nighttime!
This tutorial is perfect for complete beginners to intermediate shooters. It is meant to drastically accelerate your learning process and give you concrete steps on studying and implementing professional shooting techniques. As we go along, I will answer the following questions.
We will cover:
- How do I create dimensional portraits that have that extra “something”?
- Which gear should I shoot on? (Does it even matter?)
- How do I properly prepare for a shoot to make the most out of it?
- How can I find and use beautiful natural light?
- Where do I find models for collabs, especially as a beginner?
- How do I pose, direct, and – in general – communicate with a model?
- Where should I focus my attention when I first start shooting?
- How do I deal with anxiety and overwhelm on shoots?
- How can I come up with creative ideas and concepts for shoots?
- How do I keep progressing once I feel like I’m plateauing?
About the tutorial:
The tutorial is split into chapters for your convenience. You can either watch it chronologically in one piece, or you can watch it buffet-style – view or review the section that pertains to your current learning focus.
As I mentioned, this course caters to anyone from complete beginners who have never touched a camera, to anyone who has been shooting for a while but is looking to really solidify and round out their skillset.
Why should you invest in a shooting tutorial when everything can be “fixed in Photoshop” these days? Take it from someone who spends a lot of time at their desk – the better your shot is in-camera, the more likely you are able to do something epic with it in editing – and within less time, too. Small fixes in the shoot usually result in huge time-saves in editing. An image can be amazing with very little editing if you have a strong raw file, however it is VERY VERY difficult, if not impossible, to create a quality result in editing based on a bad raw file.
The techniques taught can be applied to any type of portrait shoot, whether you’re more interested in studio or natural light shots! Most of the tutorial heavily revolves around techniques for exterior shooting.
This tutorial DOES NOT teach ANY editing! If you are a beginner looking to get into not only shooting, but also editing portraits, I would recommend taking a look at the Beginners’ Editing Tutorial.
Included with this download:
– The full 3h shooting tutorial (digital download, ZIP file)
– A PDF of quick guides to take along on shoots (for lighting, location, posing, camera settings,
Models: Marcella / @marcella_bianca // Kaitlyn / @kaitimackenzie // Jade @jadeaaalynn // Amber / @ambaluna
Portrait Editing in Photoshop for Beginners 2.0
Starting to learn Photoshop to edit portraits can be incredibly intimidating! This tutorial aims to alleviate the stress and take a simplified approach to PS. We eliminate all the unnecessary clutter in our workspace, and then dive into explaining the select few tools that are actually necessary to edit a creative portrait quickly and efficiently. Then, we apply all tools in a full start-to-finish walkthrough of a professional, creative portrait edit. You can follow along with the RAW files provided!
We will cover:
THEORY
- A simple approach to navigating the Photoshop interface
- The essential tools for portrait editing
- Navigating and using the menu bar
- Using layers, masks, and adjustments to edit efficiently
EDIT WALKTHROUGH
- Using the Camera RAW interface to import and balance RAW files
- Removing distractions with the clone stamp tool
- Retouching the skin via Frequency Separation
- Adding dimension to the skin and eyes via Dodge & Burn (contouring)
- Correcting skin tones via selective color and HSL
- Adding dimension to portraits via curves
- Creating subject separation with selective toning
- Adding style via hue shifts and selective color
- Sharpening and exporting for web use
About the tutorial:
Why should you learn to edit in Photoshop versus in Lightroom?
Well, LR is great for some really simple edits. If you want to grow your editing skills past the basic level in the future, I would recommend investing in building a foundation in Photoshop that you can continue to build on, instead of becoming an expert in Lightroom, where you will soon hit a cap in growth potential.
If you are a beginner who just started shooting portraits, or you are looking to solidify and round-out your shooting skillset, this tutorial can be paired with the Portrait Shooting Tutorial.
Included with this download:
– The full 2:00h editing tutorial (digital download or replayable online stream)
– The RAW file of the editing tutorial image (full version and compressed version for slower systems)
– My simplified and decluttered Photoshop Workspace and Toolbar
– Instructions on how to import the Workspace and/or Toolbar
Unfortunately, you may not post the image anywhere online or use it for any purpose other than following along with this tutorial.
Model: Marcella / @marcella_bianca
Dodge & Burn Portrait Retouching Tutorial 2.0
Welcome to the brand new Dodge & Burn Retouching Tutorial!
This tutorial breaks down Local Dodge & Burn in a beginner-friendly manner, and offers a complete guide to a full retouching workflow.
Table of Contents:
- Introduction & Theory
- Important Terms
- Local Dodge & Burn Basics
- Frequently Asked Questions
- Retouch I & II – Full Walkthroughs
- Raw Process
- Cleanup
- Local D&B
- Contouring (Global D&B)
- Skin Color Correction
- BONUS: Style and Export
We will be working in Adobe Photoshop & Camera Raw! A basic knowledge of both programs is recommended.
There is no prior knowledge of dodge & burn required. The tutorial is split into chapters for your convenience, but it is easiest to watch in chronological order.
The techniques taught can be applied to any portrait shot! Retouching is universal to all types (daytime / nighttime / neon / etc.) of portrait photography. I hope this tutorial will help you build a firm grip on dodge & burn, and take your retouching game to the next level!
Included with this download:
– 3.5 hours of course material
– The RAW file of the walkthrough images
– LUTs for skin color correction and D&B assist
– Photoshop actions for LDB, Contouring, and Export
– Soft Proofing Assist for Raw Import
– Minimalistic Photoshop Toolbar
– Local D&B Brushes
– Contouring Exercise
Unfortunately, you may not post the image anywhere online or use it for any purpose other than following along with this tutorial.
Models: Keep / @keepchambers // Kaitlyn / @kaitimackenzie
Liquidverve Coloring and Stylization for Portraits (3.0)
Welcome to my in-depth coloring and stylization course for portrait editing! This tutorial will introduce you to color theory and application in portrait editing, so you can build a strong foundation for creating your own style!
This tutorial is for you if:
- You are looking to improve your understanding of how to shift colors, how to combine them into harmonies and palettes, and how to choose colors for an image! You can be completely new to stylization, or you can already be an intermediate/advanced colorist looking to refine your skills.
- You have an understanding of the Photoshop interface and base tools, such as layers, masks, paintbrush, eraser, etc.
Note: This course is built primarily for Photoshop users, however, the theory and practical skills taught can be applied to almost any coloring platform (including for video grading). The course discusses the foundations of how coloring tools work and the thought process behind making coloring choices
Disclaimer: This course does NOT cover any retouching or compositing! It focuses solely on the coloring and stylization process. If you’d like to learn retouching too, I’d recommend taking a look at the Retouching & Stylization Bundle!
We will cover:
- Chapter 1 – Foundations of Color – Discussion of basic color theory: how to break down, modify, and mix HSL color
- Chapter 2 – Color Harmonies – Introduction to the classic color harmonies
- Chapter 3 – Tools & Application – Practical application of color shifts via tools in Photoshop and Lightroom (or Camera Raw)
- Chapter 4 – Analyzing Raw Colors – Analysis of colors present in a raw file and discussion of finding nearby harmonies that are easy to implement
- Chapter 5 – Creating Cinematic Colors – Discussion of how to create cinematic palettes via meaningful hue and harmony choices based on the image narrative
- Chapter 6 – Subject Separation – Demonstration of a variety of techniques to deliberately guide attention within the frame
- Chapter 7 – Walkthrough – Full start-to-finish walkthrough of the coloring and stylization process of an image via Camera Raw and Photoshop
- Chapter 8 – Workflow Efficiency – Demonstration of how to use LUTs (Photoshop coloring presets) to create a fast and efficient stylization workflow
Included with this download:
– The full 3:20h course (digital download)
– My LUTs (Photoshop coloring presets)
– The RAW file of the main walkthrough image
– My minimalistic Photoshop Toolbar
– My Photoshop Actions
– Instructions on how to import all files
Unfortunately, you may not post the walkthrough image anywhere online or use it for any purpose other than following along with this tutorial.
Models: Kaitlyn / @kaitimackenzie // Amber / @ambaluna // Jessie / @jessiepaege


